
It can be a bit overwhelming to view your entire service line inventory all at once, especially if you have a large number of assets. The old proverb says when you are tackling a large project, to "eat the elephant one bite at a time". You can create those manageable bites by applying filters to your inventory and creating saved views. This will allow you to see exactly what you'd like to focus on, such as all unknowns, only lead lines, viewing only customer owned unknowns, and so on.
The platform has a few pre-built views for you to use already:
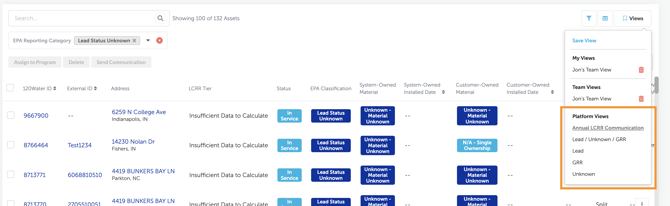
Clicking any of these options will automatically apply filters to your inventory to see all leads, unknowns, GRRs, etc. However, if you want to get more detailed views, you're able to create your own.
Below is a short video and step-by-step guide on how to create and share filtered views.
💡120Water Pro-Tips:
Some examples of views you might want to create and save:
- Customer-Owned Lead Service Lines
- Customer-Owned Unknown Service Lines to assist with creating a list that you might want to target with residential surveys
- If you are in a larger municipality with multiple zip codes, filter by a certain zip code to hone in on a particular geographic location.
- You can then EXPORT the data in these various views by clicking the "Up Arrow Box" button in the top right corner of the table.